You’ve heard of RSS? You’ve seen those small funny tags on websites? You’ve heard co-workers and acquaintances swear by it, but still have no idea what RSS is? Well don’t worry, according to a recent survey you’re still in the majority, but this is changing rapidly. In the information world, RSS is not only revolutionalizing the way news, media and content creators share information, but it also is swiftly changing the way everyday users are consuming information.

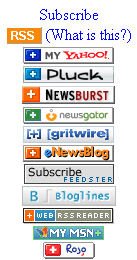
RSS stands for “Really Simple Syndication” and is a file format for delivering regularly updated information over the web.
Just think about the websites and news information sources you visit every day. It takes time to visit those sites and scour the ad-filled and image-heavy pages for just the text you want to read, doesn’t it? Now imagine if you could visit all those information sources and web pages in just one place and all at the same time … without being bombarded with advertising… without having to search for new information on the page you’d already seen or read before… and without having to consume a lot of time visiting each site individually. Would that be valuable to you? Well, it’s available now through a newsreader and RSS.
This week’s discovery exercises focus on learning about RSS news feeds and setting up a Bloglines account (a free online newsreader) for yourself to bring your feeds together.
Discovery Resources:
Discovery Exercise:
- Follow the discovery resources above to learn more about RSS and newsreaders.
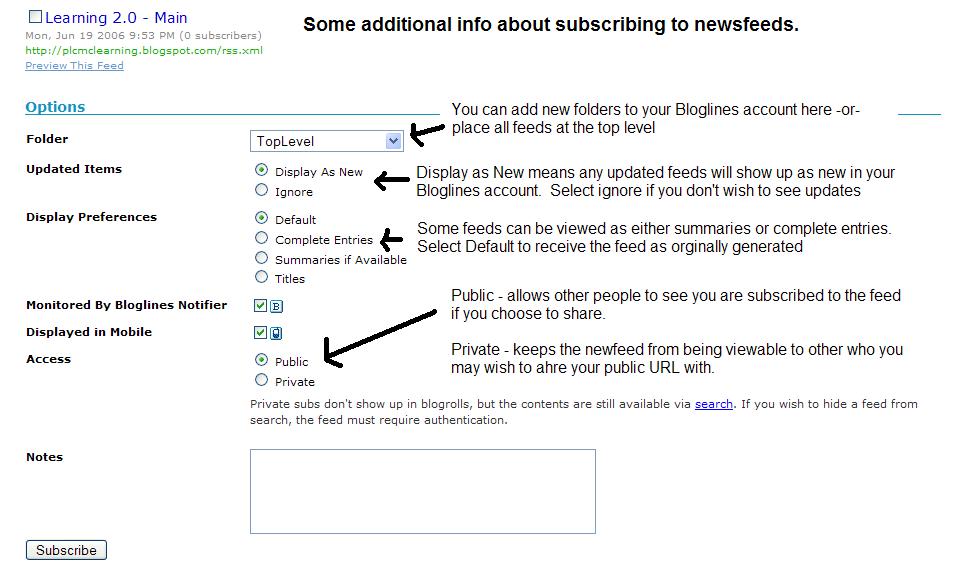
- Create a free online Bloglines account for yourself and subscribe to at least 10 newsfeeds to your reader. See Using Bloglines Tutorial steps 1-3 for instructions.
Newsfeeds:
- 23 Things participant blog feeds - Subscribe to several of your co-workers' feeds. This is as easy as typing the blog URL into the subscribe field in Bloglines. Try it, it's easy!
- Then try adding a few other types of news feeds from news sources.
3. Create a post in your blog about this exercise. Optional: If you're up to the challenge, you can provide the URL address to your public bloglines account (find where to find this below)
Don’t know what to blog about? Think about these questions:
What do you like about RSS and newsreaders?
How do you think you might be able to use this technology in your work or personal life?
How can libraries use RSS or take advantage of this new technology?
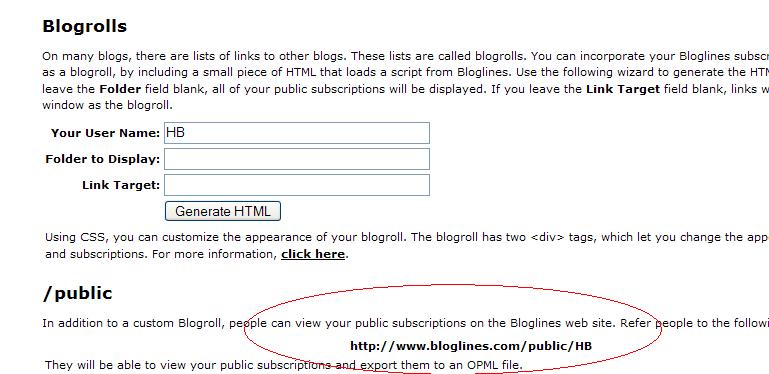
How to find your public Bloglines URL:
- How to find your public Bloglines URL:

2. Scroll down the right screen pane and locate the public URL (see screenshot)
3. Be sure to add this as part of your post to demonstrate your completion of this activity.
In conclusion ...Here is link to my public Blogline's account: http://www.bloglines.com/public/hb
Why have a public account? To share blog rolls with others, of course. That's how the
L2 participants list is updated; it's powered through a public blogroll. :)
PS: Once you tackle this discovery exercise, you've tackled the most difficult one of the whole 23. :)


